Some of my most profitable images are landscape panoramic photos, selected for large reproduction in office lobbies, museums or sometimes private homes. With the current generation of extremely sharp lenses and very high resolution sensors, and advances in photo processing software and hardware, it is straightforward to make enormous, high quality, and visually flawless panoramas from individual images. One decision which can profoundly affect the outcome of the panorama is the chosen projection mode.
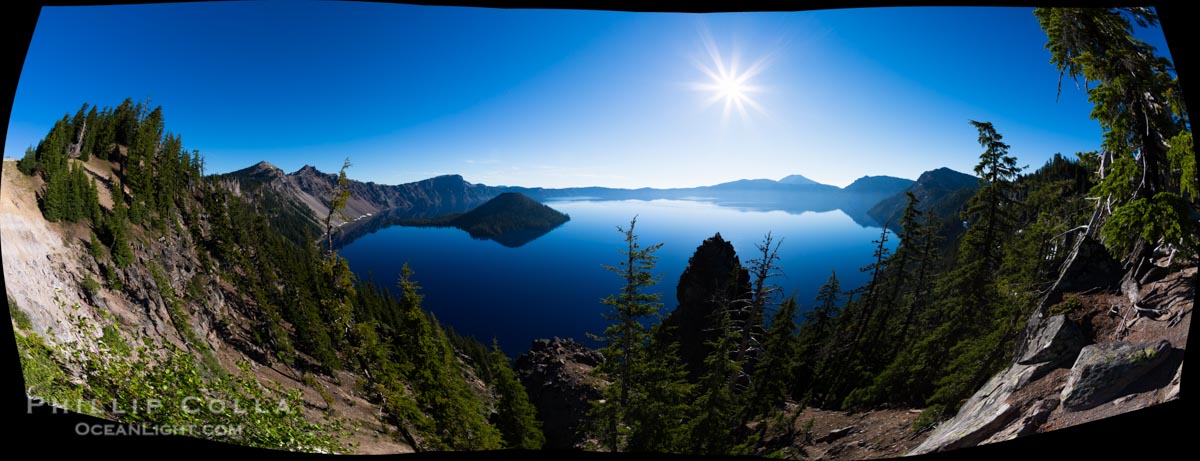
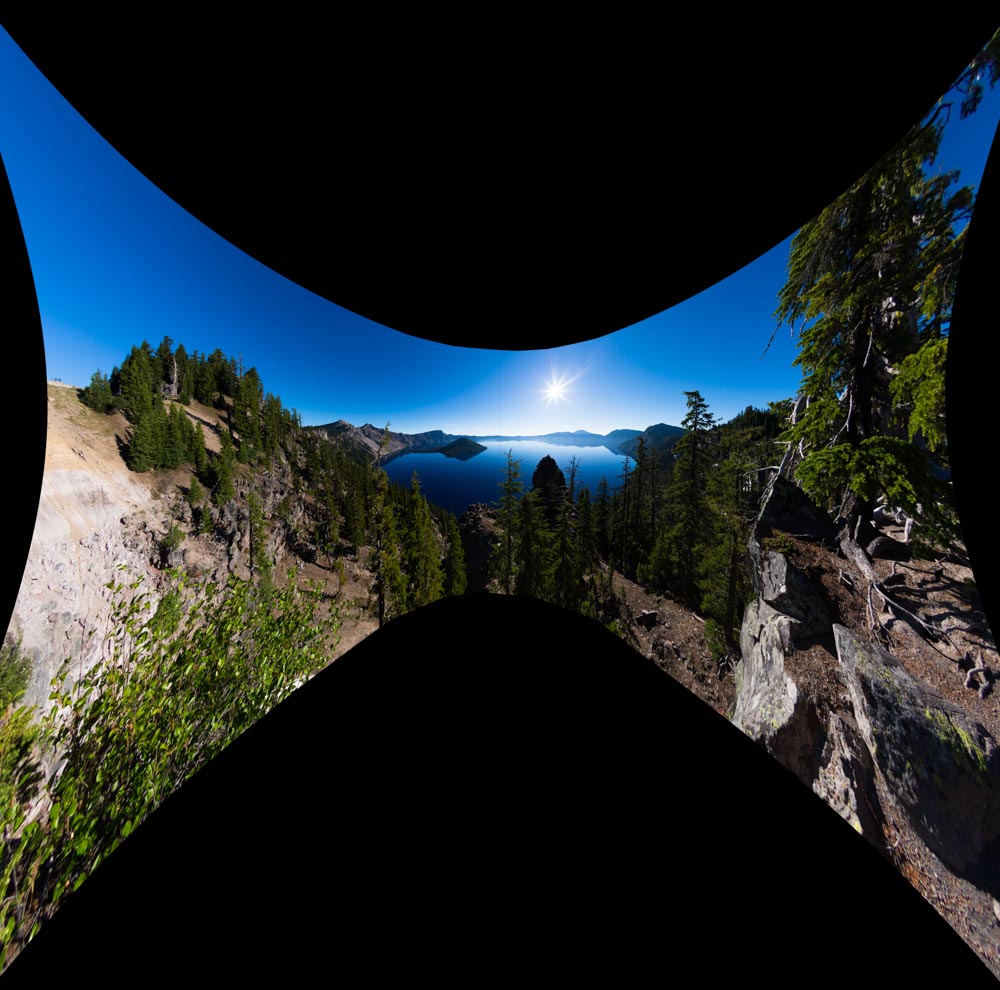
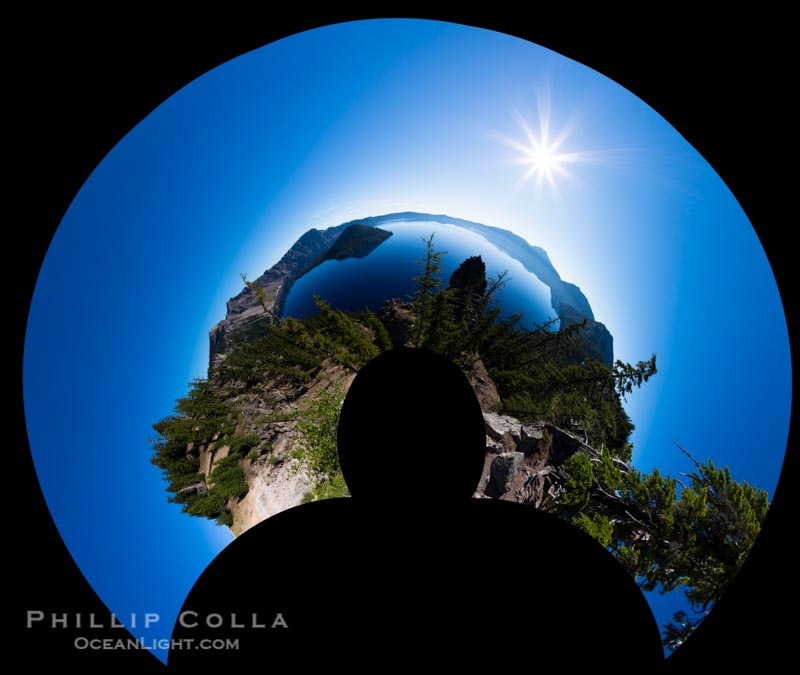
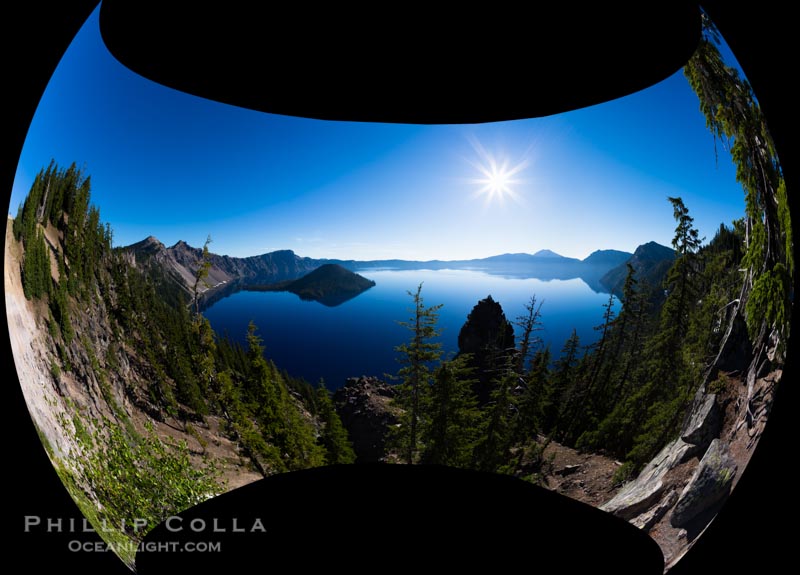
After trips to Zion, Crater Lake, Death Valley, and Yosemite National Parks, during which one of my goals was to create very large, highly detailed panoramas with the Nikon D800 and D800e cameras, I have been assembling a number of panoramas and deciding which ones to keep and present for sale and licensing. I use a variety of software to create the final panoramas from individual images, including Photoshop, Panorama Factory, PTGui and most recently, AutoPano Pro 3.0. In some cases, the choice of a projection seems to make little difference. But in compositions that involve very wide angles, or include a lot of sky (such as Milky Way panoramic photos), the projection mode can make a huge difference, especially with elements of the composition that are at or near the edges of the final image. To illustrate this, here are 7 different projections of the same panorama, formed from six individual frames shot at Crater Lake using a Canon 5D Mark III and 15mm full frame fisheye lens. I have a few further remarks about my choice(s) of stitching software at the end of the post.
All of these panoramas are made in fully automatic mode in AutoPano Pro, with no adjustments other than simple contrast, saturation and curve in Lightroom before passing the component images to AutoPano Pro. The results are uncropped to emphasize the distortion (or lack thereof) inherent in the different projections.
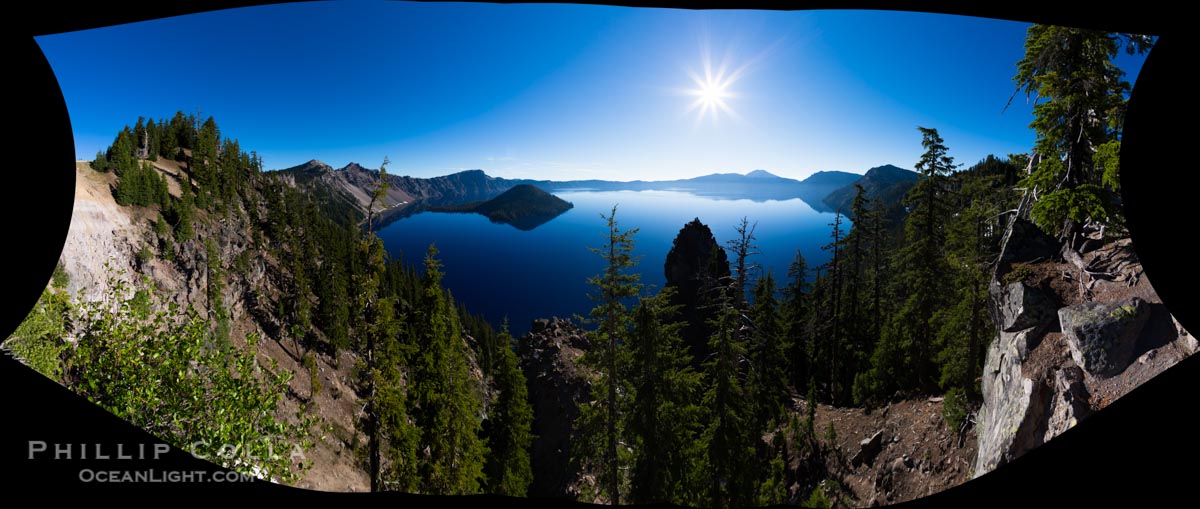
Cylindrical
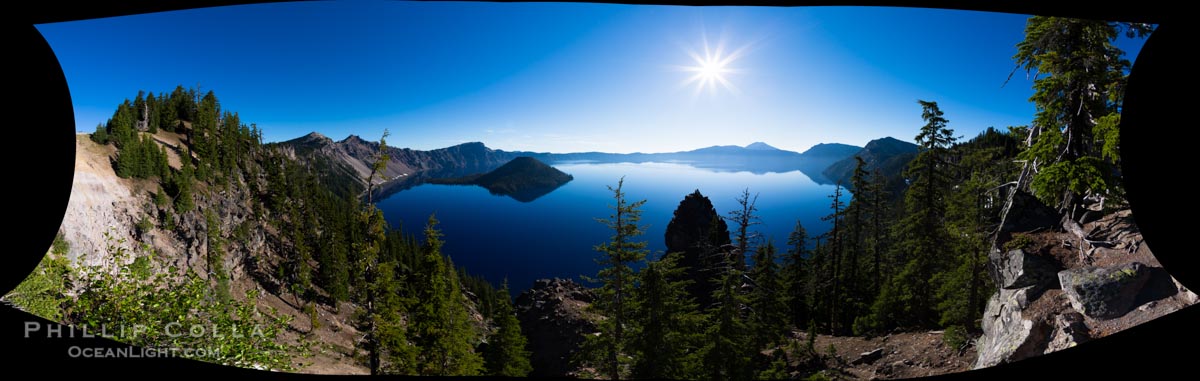
Spherical
Hammer
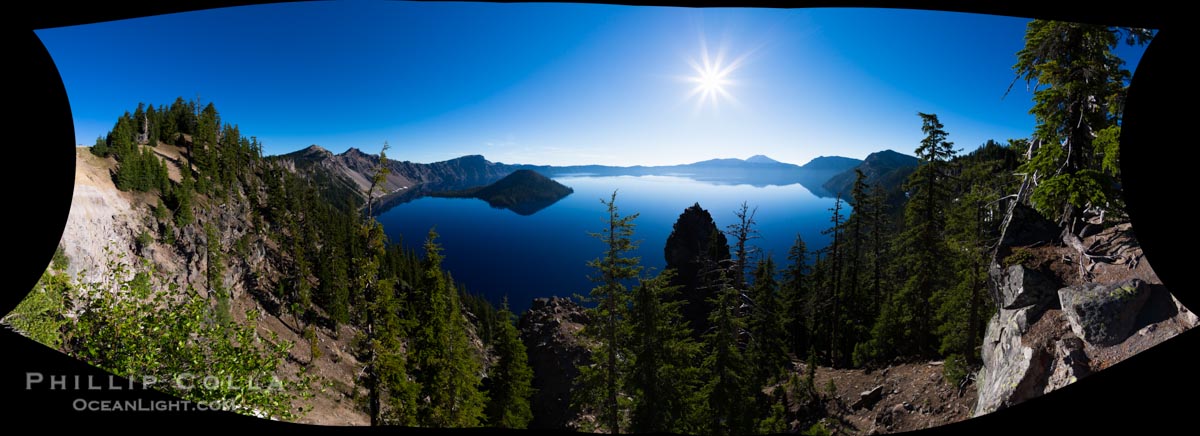
Mercator
Panini
Stereo
Mirror Ball
Note there is no ghosting in these images — I am really impressed with AutoPano Pro for this reason and it is quickly becoming my preferred panorama software. Also, AutoPano Pro seems to make better use of the computer’s resources when stitching enormous (250 MB to 1.5 GB) panoramas. Photoshop seems to often bring the computer to its knees and it painfully slow in many cases. Panorama Factory simply “runs out of memory” in many situations, and does not seem to take advantage of the 32GB of memory I have installed on my iMac. PTGUI is great for allowing me to precisely choose the center of the image which a given projection will be based, but I find that often PTGui’s automated selection of stitching points includes errors that lead to ghosting or other artifacts. AutoPano Pro, however, processes panoramas quickly and without bogging down my computer overly much (I am still able to multitask while AutoPano Pro is rendering the final images). Furthermore, AutoPano Pro has excellent automatic determination of stitch points (the pairs of points needed to help the stitching algorithm decide how to align two overlapping images); I rarely have to resort to placing manual stitch points with AutoPano Pro. Lastly, I shoot many of my daylight panoramas handheld, which means there is some ghosting and parallax error in foreground objects. Photoshop does a good job resolving these problems, but so does AutoPano Pro and so much more quickly and with less compute time. There you go, I think you can guess what my favorite stitching software is at the moment.


